:max_bytes(150000):strip_icc()/60915290_cc0edfa31b_o-587e855a5f9b584db32ecb7e-58c437c95f9b58af5c69ba73.jpg)
Learn How to Make Crystals With These Easy Experiments
Salt Crystal Experiment. Here are the instructions on making salt crystals. The method is similar for Epsom and sugar as well. Materials Required. ½ cup water; 3 cups salt; Pan; Jar; Pencil; String; Scissors; Tape; Food Color; Growing Homemade Salt Crystals. Heat about 120 mL of water in a pan. Heating should continue until the water begins to.

Keitha's Chaos Updates
Step 7: Move the jar to a safe place and wait until the crystals form. Method 3. Step 1: Take a flat, shallow, wide container with distilled water and add alum salt or table salt. After a few days, a layer of small crystals will grow at the base. Step 2: Pour the liquid and select a seed crystal with the pair of tweezers.

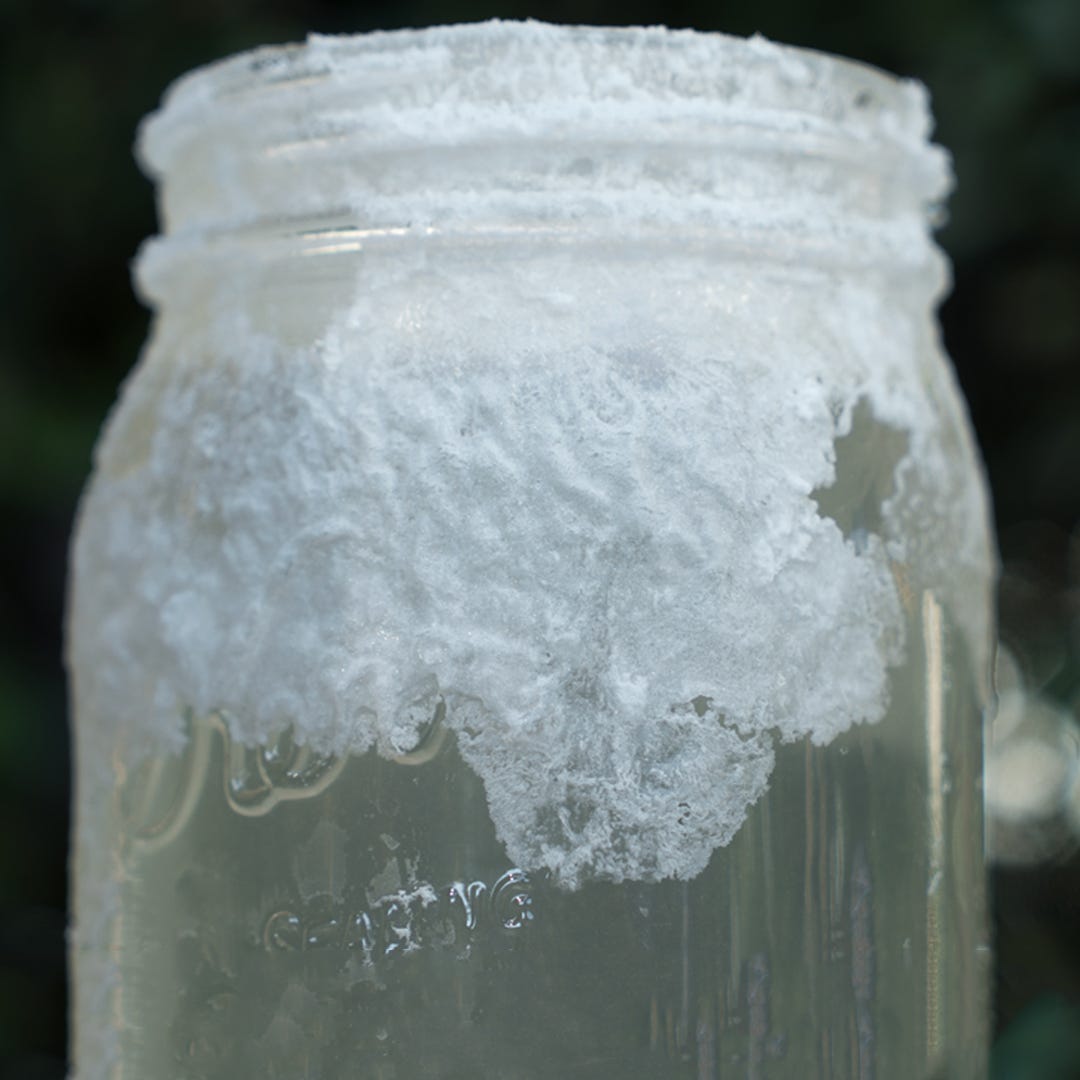
Of all the simple science projects we've made, we absolutely love this one using salt to cover
An easy way to make salt crystals is to dissolve table salt in water and leave the solution somewhere warm until the water evaporates, leaving behind sparkly salt crystals. We also made coloured salt by adding a little food colouring. This activity and more salt science experiments can be found in a salt science activity sheet made as part of a.

Salt Kristallisering Barn Experiment Stockfoton
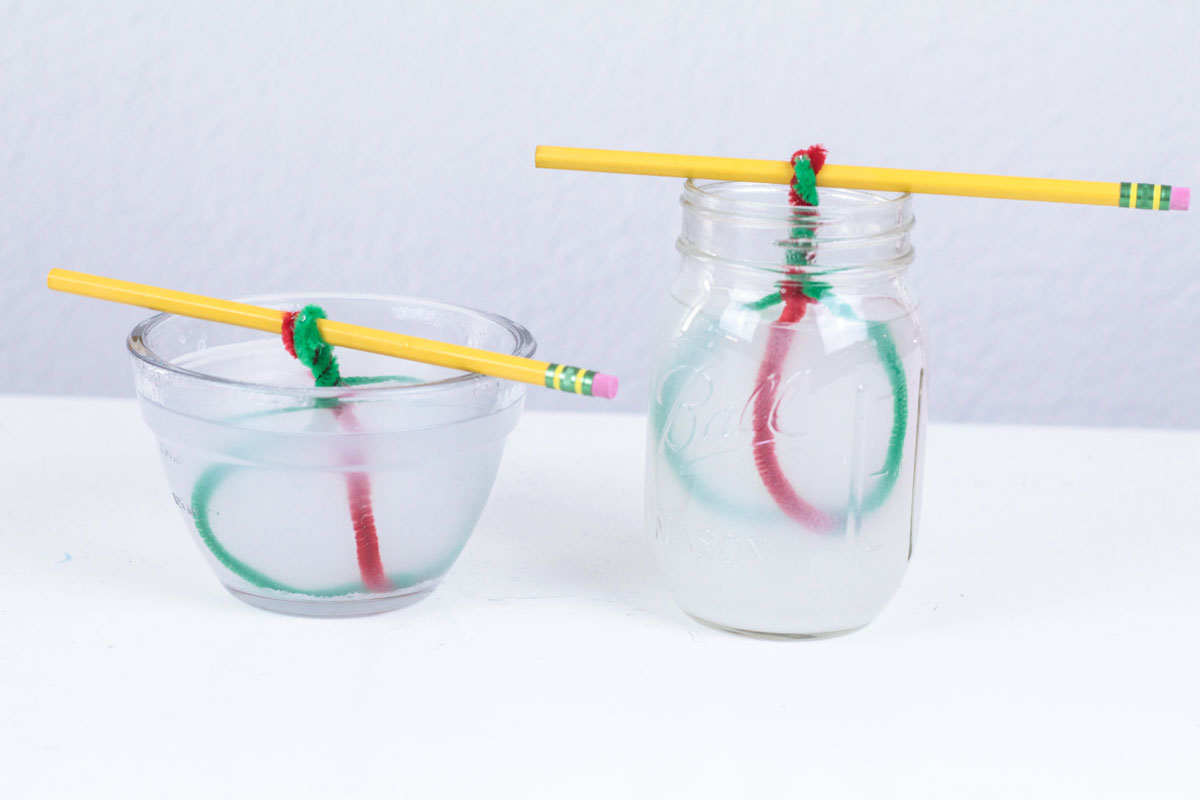
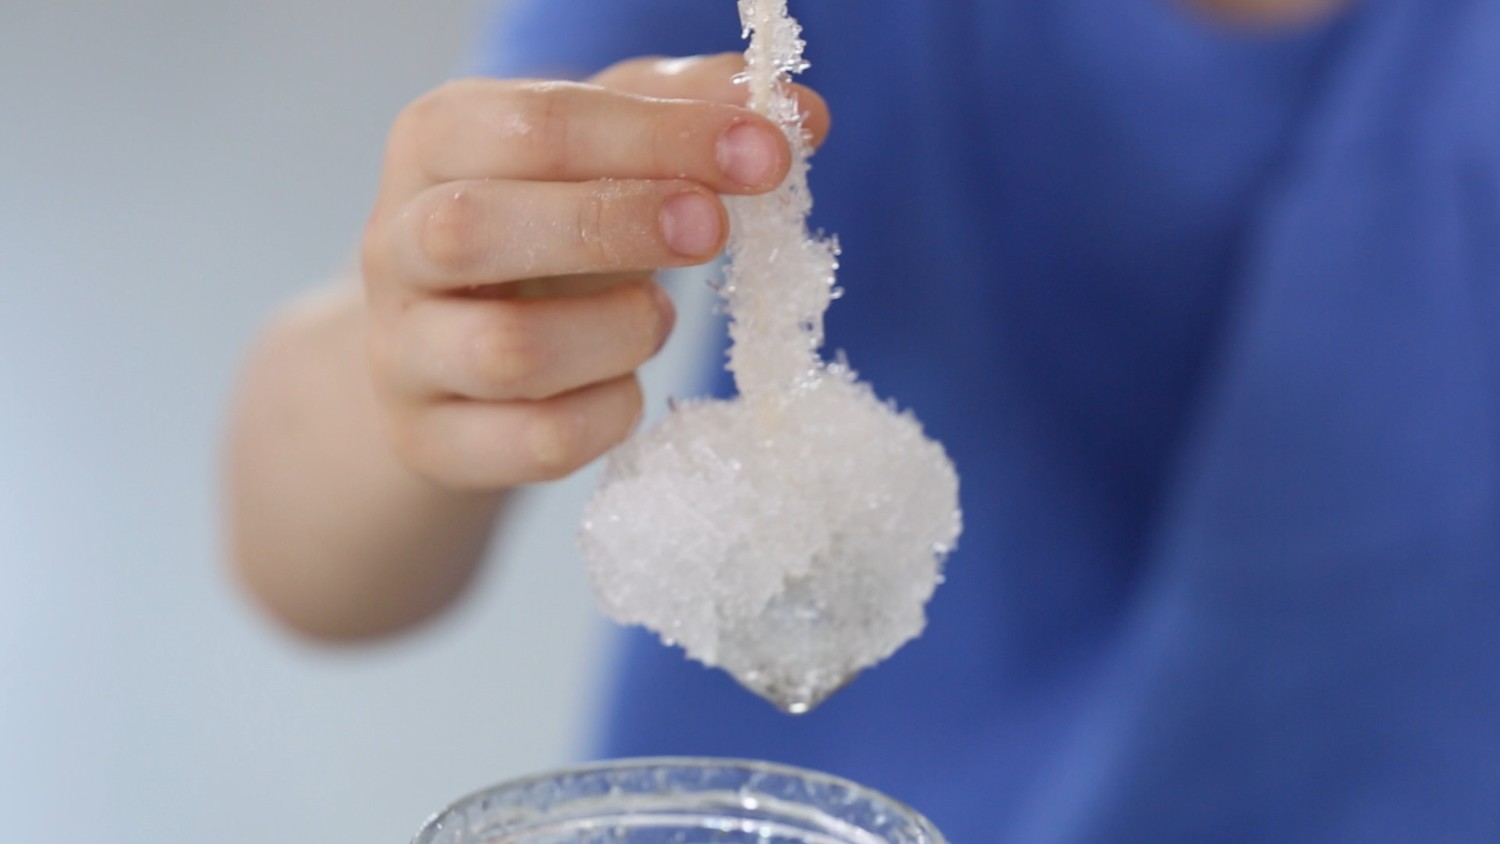
Add about half a cup of salt to the water. Mix the solution together with a spoon. Cut a piece of string with scissors and tie each end to a toothpick. Place the string over the top of the jar so that the string dangles into the middle of the solution and the toothpicks hang over the edge. Don't forget to clean up when you've finished.

processingmatter “ Salt Crystal Experiment by Evangelos Gerogianni
The dinosaur salt crystal science experiment turned out great, and the kids had a blast with it. Scroll to the end of this post for more fun dinosaur learning activities! How to Do the Salt Crystal Science Experiment. My kids love dinosaurs, so we turned them into a salt crystal science experiment! Follow along to read how we made our crystal.
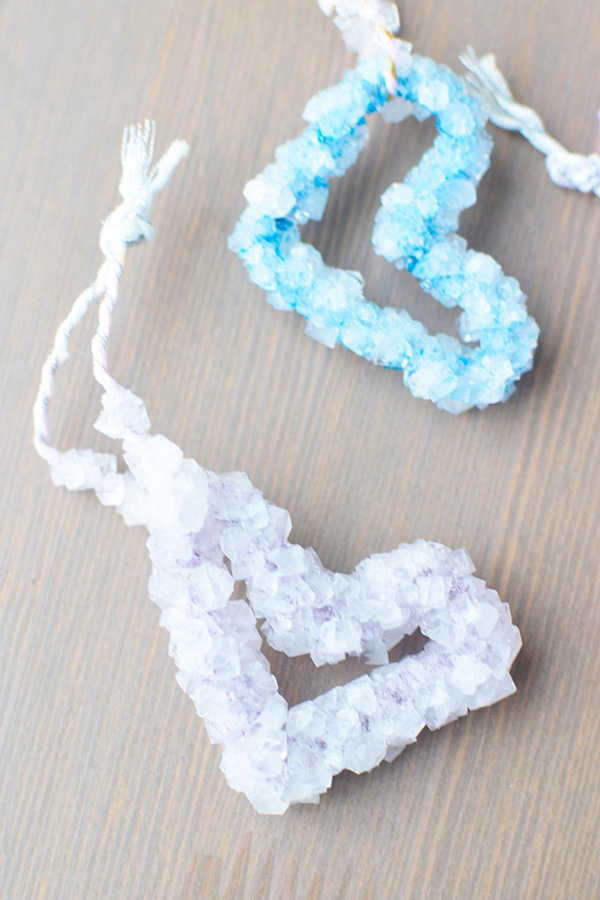
Salt Crystal Ornament Science Experiment
Process of Making Salt Crystals. Fill your container halfway with warm water. Warm water helps to dissolve the salt quickly. Add a cup of salt to the warm water and stir it continuously until the salt is completely dissolved. Repeat the process until you cannot get any more salt to dissolve. The final salt solution should not have any residue.

How to Grow A Beautiful Cluster of Table Salt Crystals Crystalverse
The technique is called single-molecule atomic-resolution real-time electron microscopy, or SMART-EM, used to study molecules and molecular aggregates. By combining it with a newly developed sample preparation method, the team captured the very formation of salt crystals. "One of our master's students, Masaya Sakakibara, used SMART-EM to study.
Salt Crystals Experiment The Beaker Life
The salt dissolves in the heated water. As the water cools, it becomes less able to hold the salt. The salt then clings to the string and forms crystals. Make This A Science Project: Experiment with different types of solutions and observe and record any differences in the rate of crystals creation.
Kids Salt Crystal Experiment Highlights Your Child & You
To make salt crystals using Epsom salt and water. Age: Upper Elementary. Time to complete: Approx. 3-4 hours. Safety concerns: Salt will need to be dissolved in boiling water and this step should.
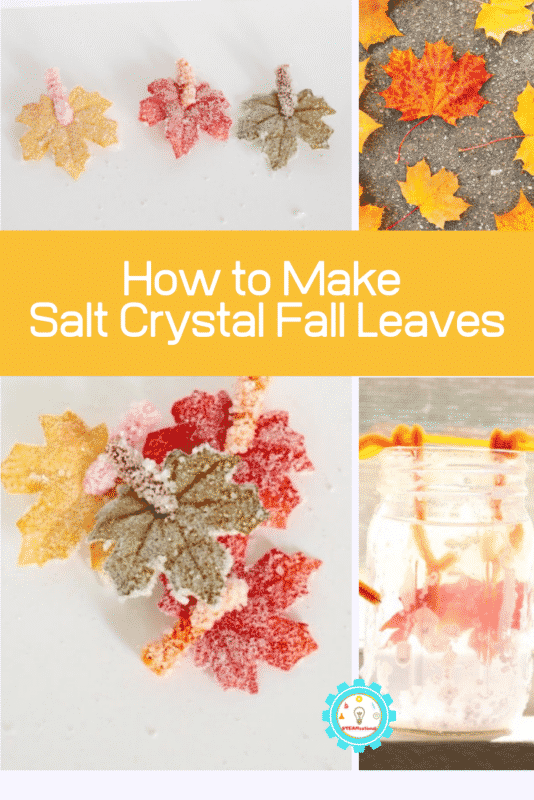
How to Do the Salt Crystal Leaves Science Experiment
3. Stir in as much salt as you can. Take the pan off the heat. Pour in about ¼-½ cup (60-120mL) of your salt and stir until the water is clear. If you don't see any salt grains in the water, stir in another spoonful. Keep stirring in more salt until you see salt grains that won't dissolve when you stir.
Video How To Make Monster Salt Crystals Martha Stewart
To make our snowy salt crystal tree, we used: I cut out a fir Christmas tree shape out of construction paper (slightly sturdier than regular paper), and set it on a plate. Then, with my help, Bumble Bee filled a clear plastic container with hot water from the tap. (Our tap water isn't hot enough to scald.) She dipped her finger in and tasted.
saltcrystalexperimentforkids Go Mommy
Pour 500mL of water into a saucepan and add rock salt. Stir to dissolve. Add as much salt as you can until it stops dissolving. Tie a salt crystal to some string, allowing the string to dangle down, and tie the other end of the string around the middle of a pencil (or teaspoon). Place the pencil across the top of a glass so the salt crystal.
How To Make Salt Crystals At Home DIY Science The Active Family
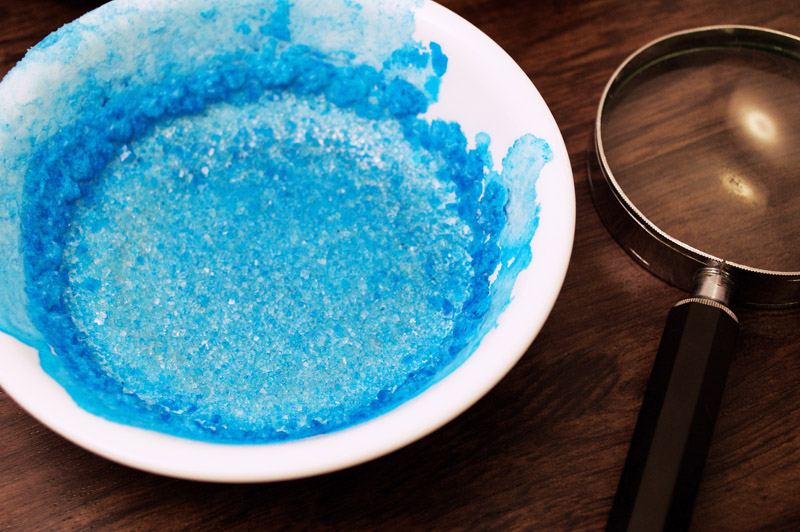
Directions: Add your ingredients to your cup (or bowl). Stir the ingredients until the salt is dissolved. Put you cup or bowl in the fridge, leaving it there for at least 3 hours. After this, you will see needle like crystals have formed at the bottom of your cup or bowl. You can carefully scoop the crystals out of the bottom to get a better look.
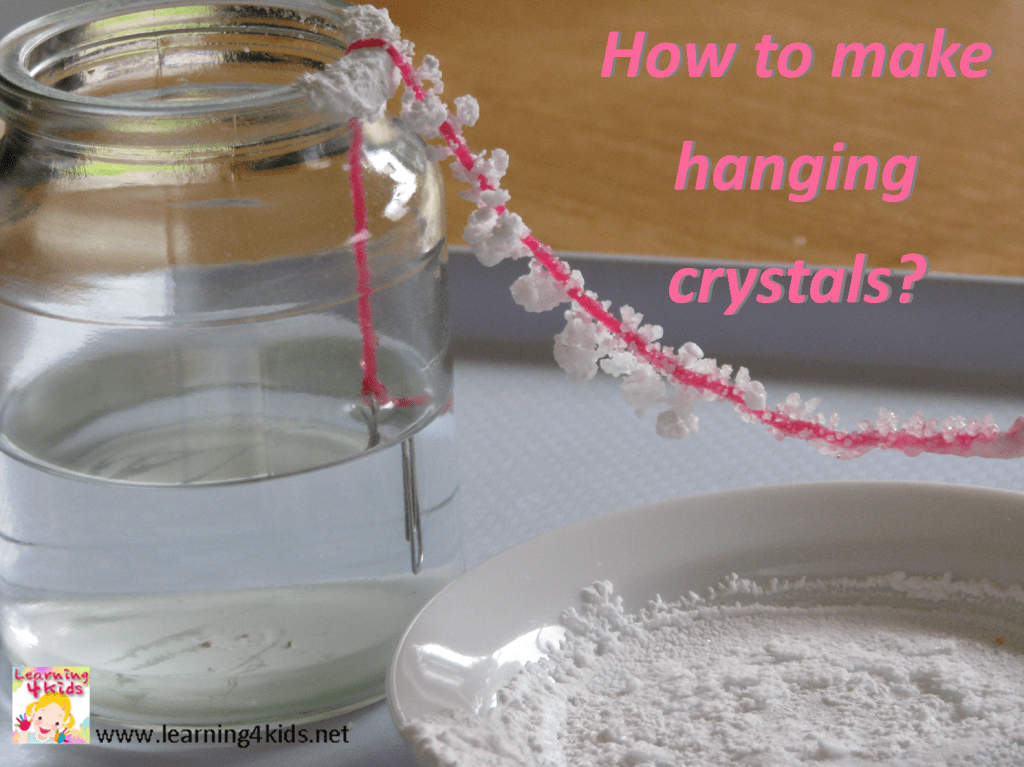
How to make Hanging Crystals? Learning 4 Kids
Boil the water on high heat. While the water is boiling, poke a hole in the center of each leaf and thread a pipe cleaner through to make a long leaf stem. Suspend the leaves from a plastic fork placed over the mouth of the jar. Once the water boils, add enough salt to create a sheet of salt crystals across the surface of the water.

Once Upon a Family Salt Crystals Experiment
Step 2: Make the supersaturated solution. Add 1/4 cup sea salt to 1-1/2 cups boiling water. Stir well to ensure as much salt as possible is dissolved into the water. If all the salt is dissolved keep adding more salt, 1 tablespoon at a time. Stir well and keep adding salt until no more can be dissolved.

Simple Science Projects How to Make Salt Crystal Feathers Simple science projects, Feathers
Steps. Boil the water. Pour the hot water into the plastic jar. Add the salt in teaspoons, allowing it to dissolve before adding the next. Continue adding the salt until it no longer dissolves, and it begins to collect at the bottom of the jar. Tie one of the string around tightly to the middle of the pencil, and the other end to the paperclip.