How do you mask images with a shape in PowerPoint? YouTube
Gunakan opsi Pilih dalam grup Pengeditan di ujung kanan tab Beranda untuk melihat dan memilih objek individu dalam PowerPoint: Klik objek untuk memilihnya. Jika tidak berhasil dipilih, pada tab Beranda, di grup Pengeditan, klik Pilih dan lakukan salah satu hal berikut: Untuk memilih semua objek dan tempat penampung di slide, klik Pilih Semua.
BAGAIMANA CARA MEMBUAT MASKING PADA IMAGE DENGAN POWER POINT YouTube
Video masking merupakan salah satu cara membuat slide presentasi kamu menjadi lebih hidup. Jangan lewatkan tutorial video masking ini agar slide presentasi kamu beda dengan yang lain. Dalam video ini saya memperlihatkan langkah-langkah membuat video masking di powerpoint. Sama aja dengan image masking, namun ini menggunakan video.
Mask images to clip shape in PowerPoint (2022) SlideLizard®
Masking Images Adding an Image or GIF Open your presentation in Google Slides. Select the slide where you want to add an image or GIF file. Click Insert → Image. You'll see a list in which you can choose from where you want to add the image. You can even look for images directly in Google and add them to the presentation. Options to insert an image
Create AMAZING SLIDES using MASKS in POWERPOINT! 😱 YouTube
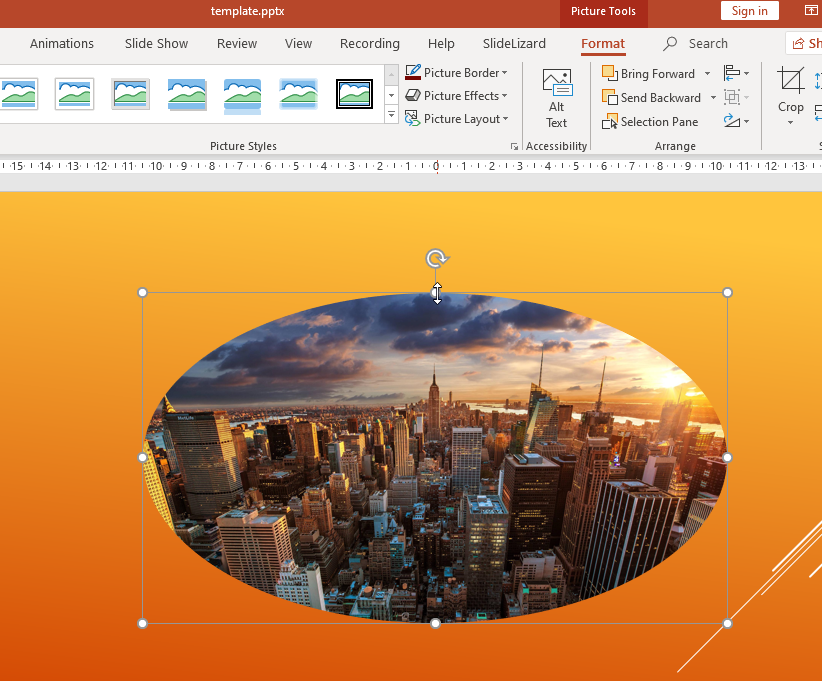
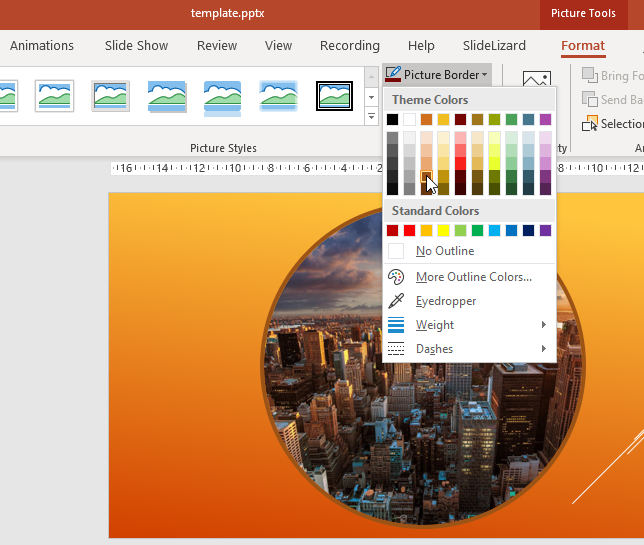
Go to the Format tab. At the very right, you'll find the Crop tool. Select the arrow below, to open the dropdown menu. Go to Crop to Shape. Select the preferred shape e.g. oval. Now you can adjust it, depending on the shape. If you want to change the aspect ratio or the zoom of your picture, select it once more and go to the Format tab again.
Masking effects in PowerPoint Creating stencils BrightCarbon
Masking effects in PowerPoint: Creating stencils. Masking effects in PowerPoint: Stencils and animation. Masking effects in PowerPoint: Stencils and animation. We like to harp on about animations and their ability to transform your presentation, but that really is the case. You may already be a stencils master having read our previous post on.
Masking effects in PowerPoint 3 simple animation tricks BrightCarbon
1. The face in the crowd The person who said that a picture speaks a thousand words was not wrong. Sometimes, the best way to communicate a message is through a powerful, full-bleed image. But if we're not careful, our presentation message is still lost, it's just now lost in some beautiful imagery.
Masking effects in PowerPoint Creating stencils BrightCarbon
Defining clipping masks. Create an effect in which the bottom layer acts as a mask for all other layers in the group. Use a clipping group as a mask. Clipping mask effect. Isolate an area and make images outside the area transparent.

💥TEXT MASKING in powerpoint 2019💥 Slide Master YouTube
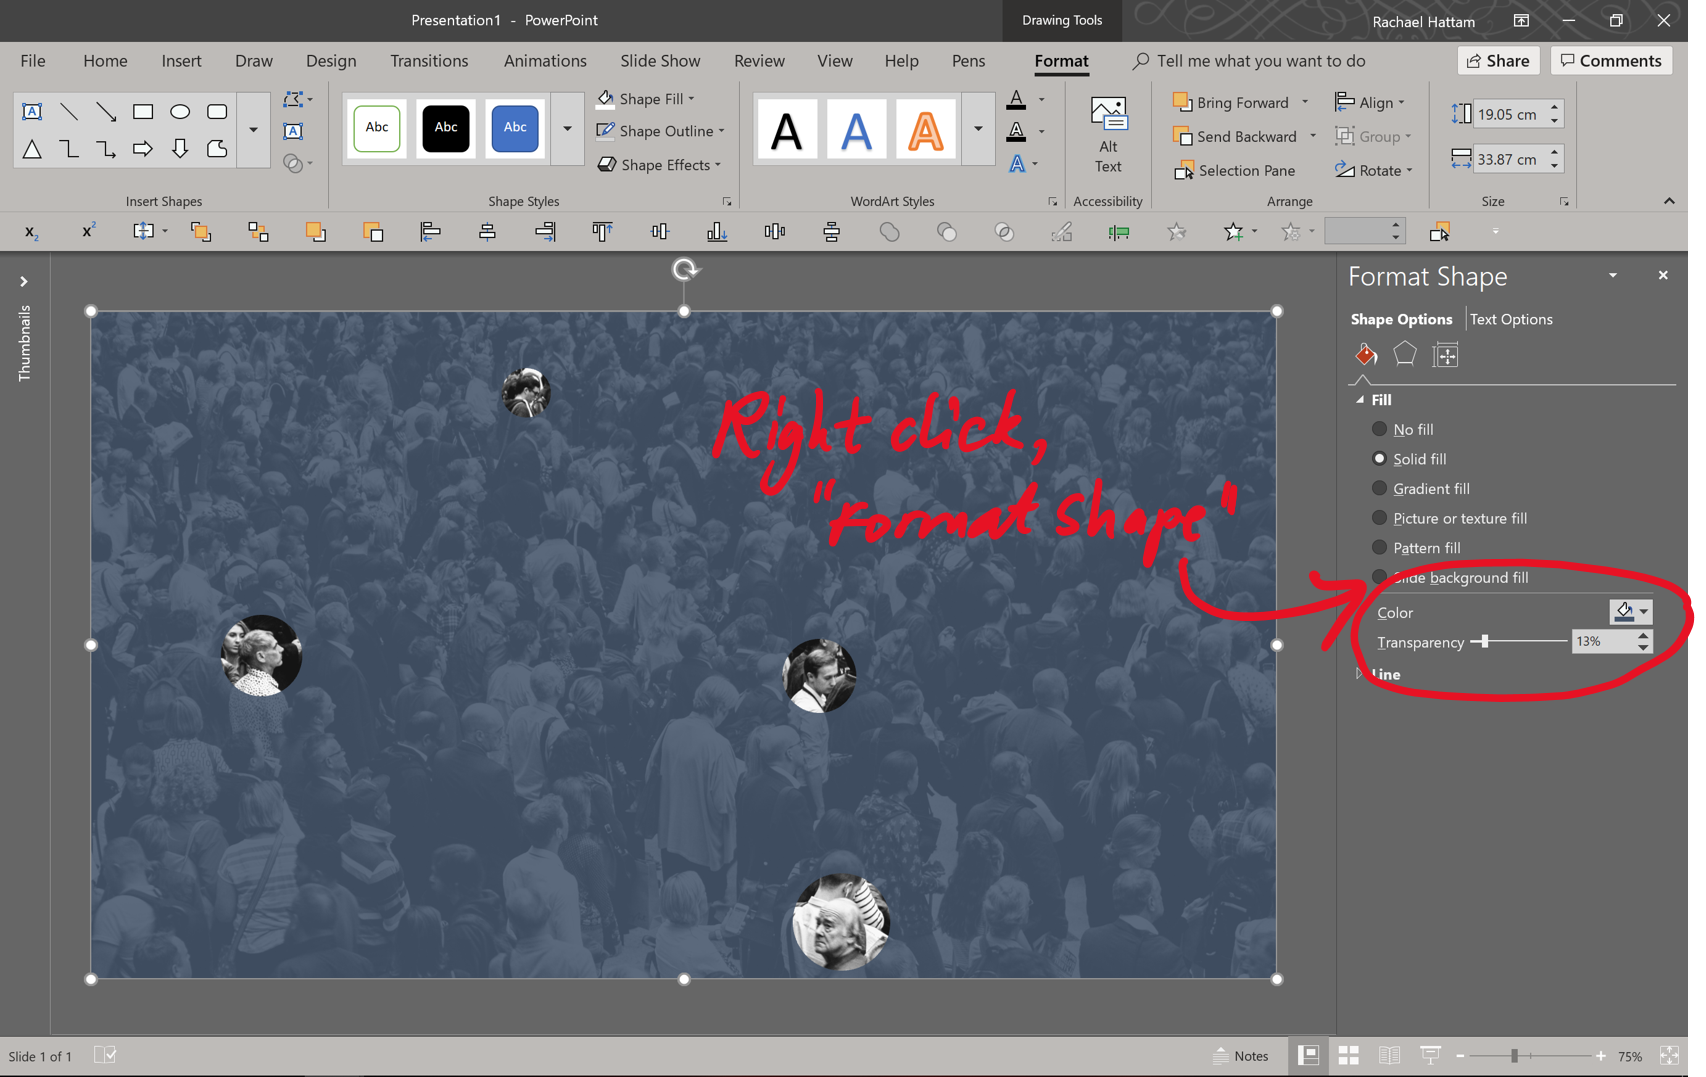
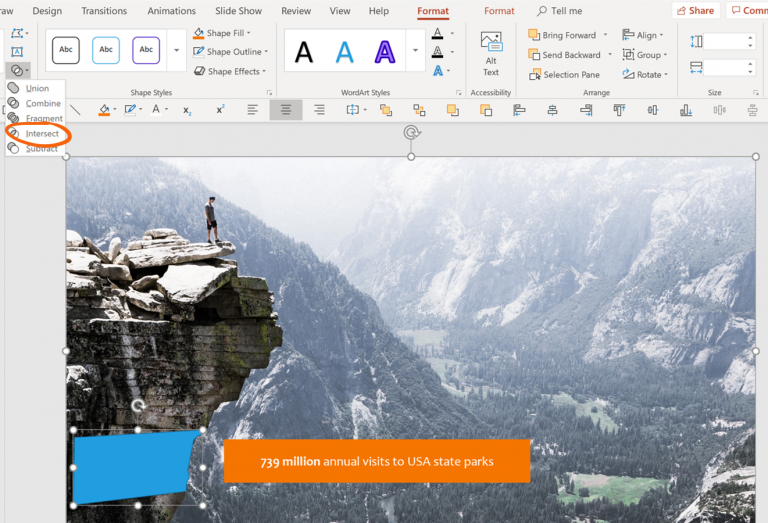
How to Apply Image Masking in PowerPoint? Basic Image Masking: 1. Insert the image into your PowerPoint slide. 2. Add a shape (e.g., a rectangle) over the image, covering the area you want to reveal. 3. Select both the image and the shape. 4. Navigate to the "Format" tab, click on "Merge Shapes," and choose "Intersect." Shape as Mask: 1.

Cara Membuat Animasi Teks (Text Masking) di PowerPoint YouTube
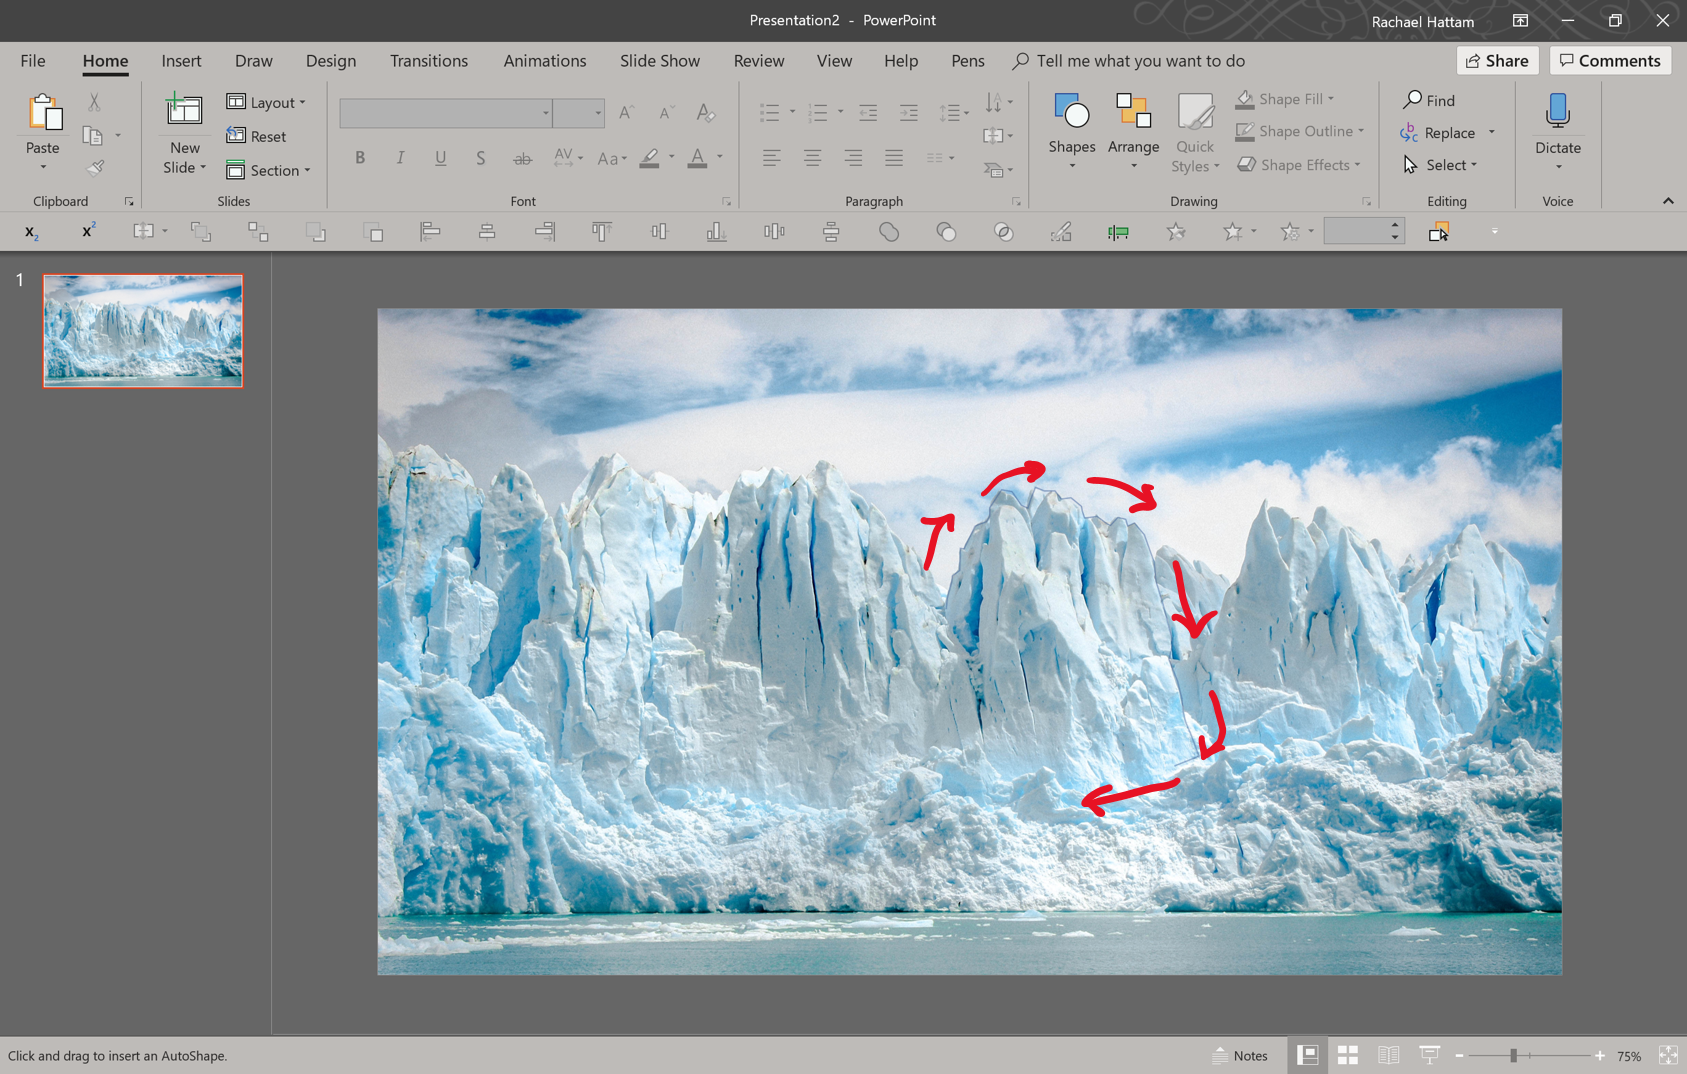
So we make a mask and there are two ways to do this: the complexity of your object will influence which method you choose. Cropping your image: duplicate your image and use the crop tools to crop the shape you want.
Membuat Animasi Masking di Powerpoint YouTube
3. Select the 'Crop to shape option' then choose the shape that you would like to use to mask the image. For this demonstration, we will use the oval shape as shown below: 4. Once the image is masked using the shape selected, you may want to edit the dimensions to suit your requirements. You need to click on the crop option again.
Mask images to clip shape in PowerPoint (2022) SlideLizard®
On the Insert tab, click Pictures. In the dialog box that opens, find the picture that you want to insert, select it and then click Insert. Once the image appears on your slide, click it and select the Format picture tab. Click on the Crop option and go to Crop to shape. The selected shape will mask your image.

Using Masking and Animation in PowerPoint PoweredTemplate Blog
Cara Membuat Animasi Teks (Text Masking) di PowerPoint Tutorial Specialist 401K subscribers Subscribe 65K views 5 years ago Tutorial Cara Membuat Intro Video Opening dengan PowerPoint.
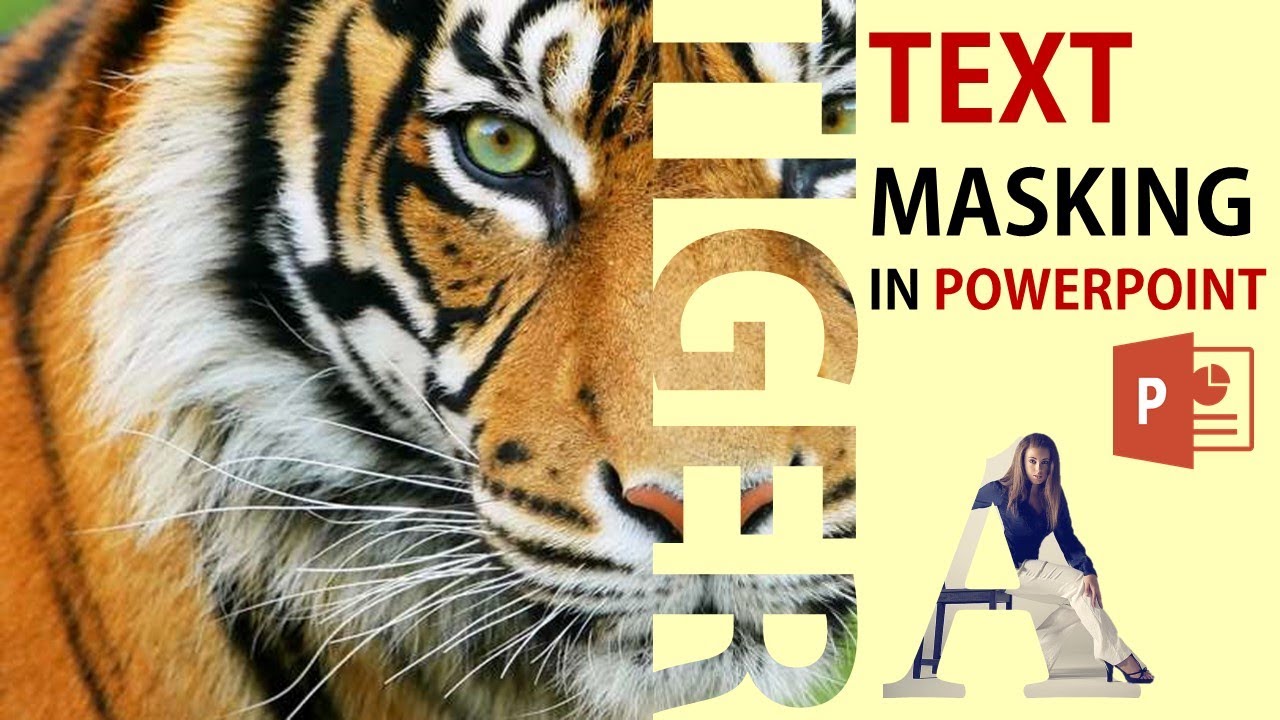
PowerPoint Tutorial Text Masking in Ms PowerPoint How to masking
Cara Mudah Membuat Masking Text Effect di PowerPoint | Tutorial Dasar PowerPoint 365 Desain CR 5.33K subscribers Subscribe 32 Share 998 views 2 years ago Desain PowerPoint Dengan.
Masking effects in PowerPoint Creating stencils BrightCarbon
Cara Membuat Clipping Mask Foto atau Gambar di PowerPointSemoga bermanfaatTerima kasihInstagram: https://www.instagram.com/ssaepudin/ -----.
Using Masking and Animation in PowerPoint PoweredTemplate Blog
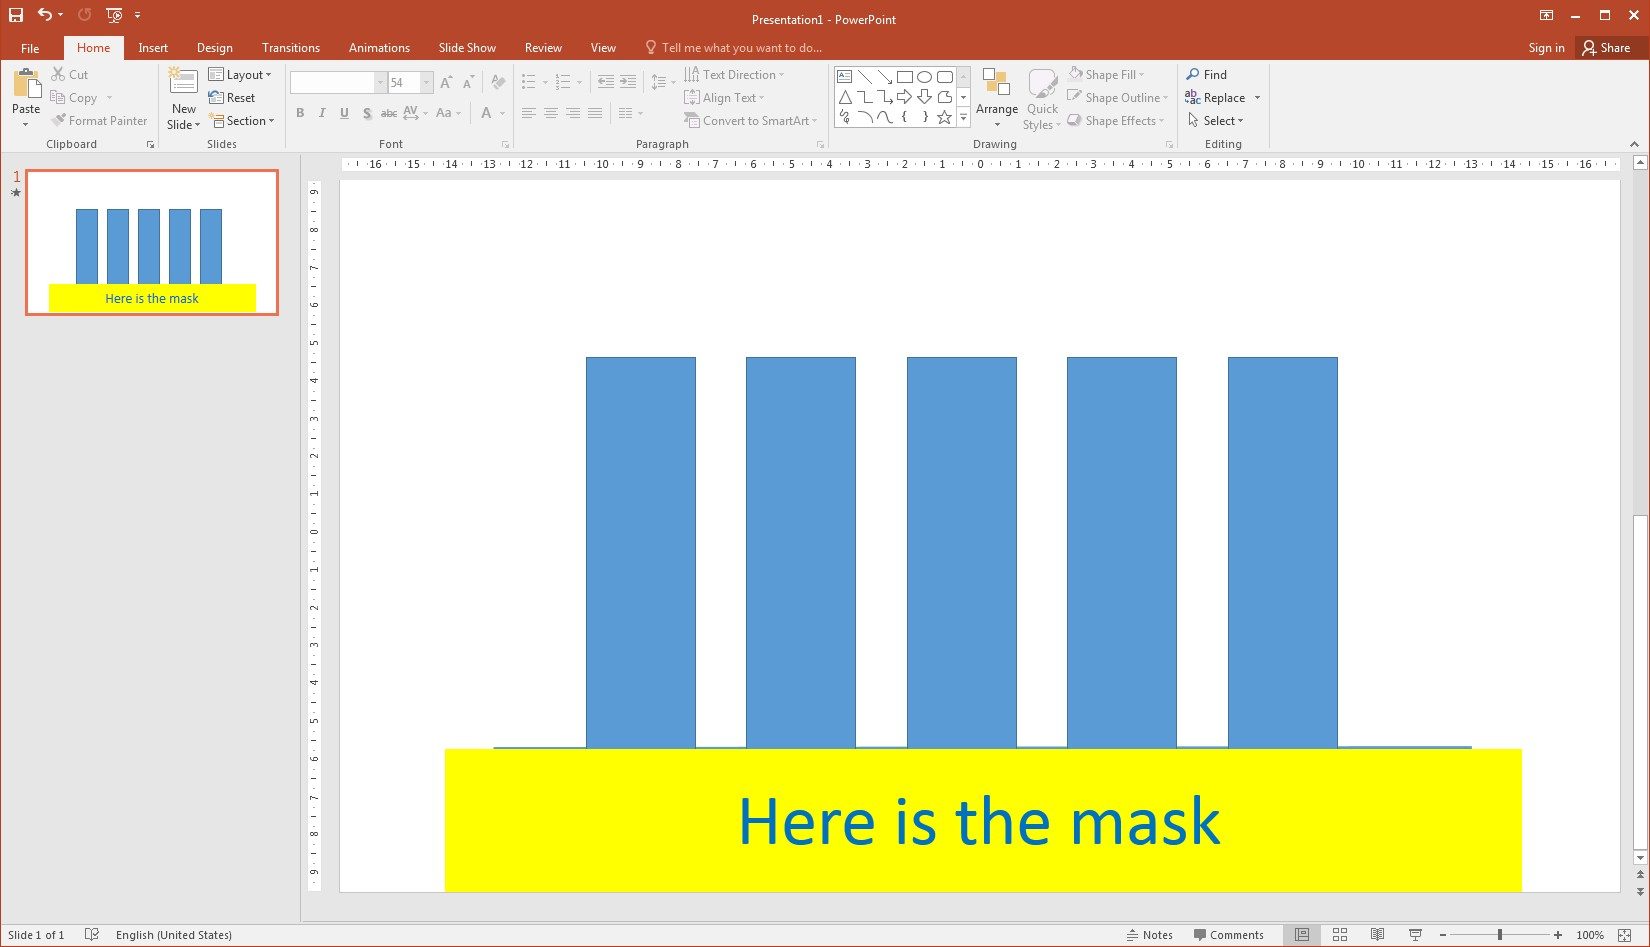
Open up the Animations tab,..then hold down the Ctrl key and select one by one the bars in your graph…. and choose "Fly in" animation. Make sure that in the "Effect Options" tab, you have selected "From bottom" (this should be the default). Open up the Animation Pane to control how the bars in the graph animate.

How to create photographic text masks in PowerPoint YouTube
Tutorial ini menjelaskan langkah demi langkah cara memasukkan foto atau gambar dipowerpoint. Dengan mengikuti panduan ini Anda akan dapat membuat slide presentasi yang keeren untuk presentasi.